One option to map your own domain to your podcast site is by utilizing CloudFlare or any other service that offers support for CNAME DNS records for the root domain.
The following steps can be taken as a reference for setting up CNAME records for your domain. However, it's important to note that for the most up-to-date and detailed information, please refer to Cloudflare's support articles.
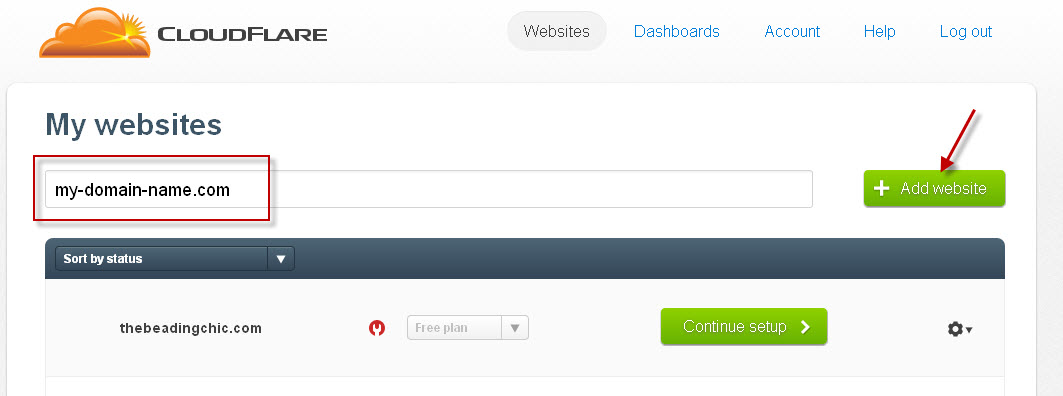
1. Add your website
Log in to your CloudFlare account, enter your domain name (eg.my-domain-name.com) in the box, then click the "Add website" button. Afterwards, click "Continue setup" to edit the domain.
2. Remove the DNS "A" records
On "Configure your DNS records" page, you need to first delete the "A" records for both your root domain and www. To delete an "A" record, click the setting icon on the right side of the "A" record and then choose the "Delete record" option.
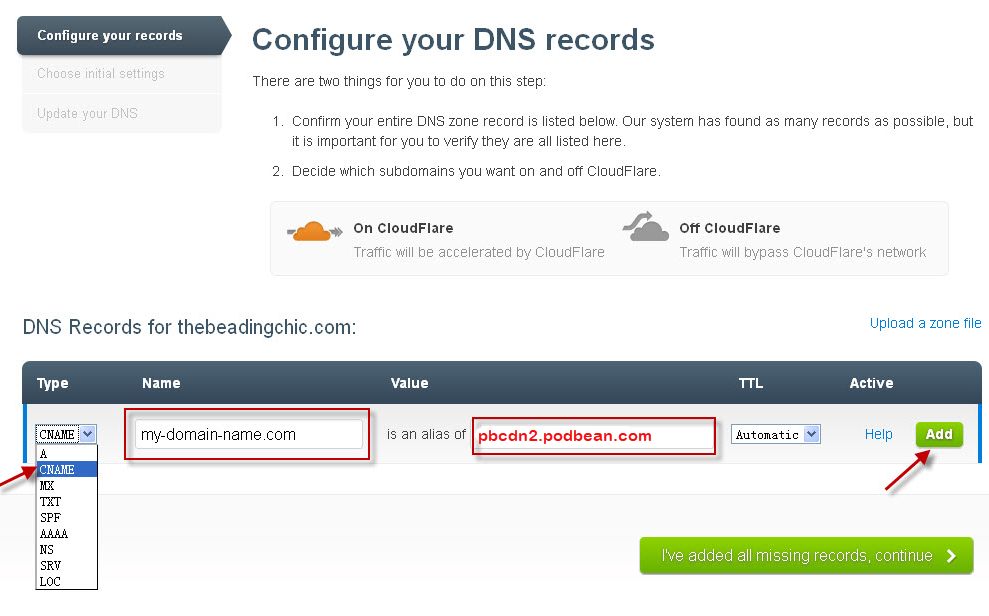
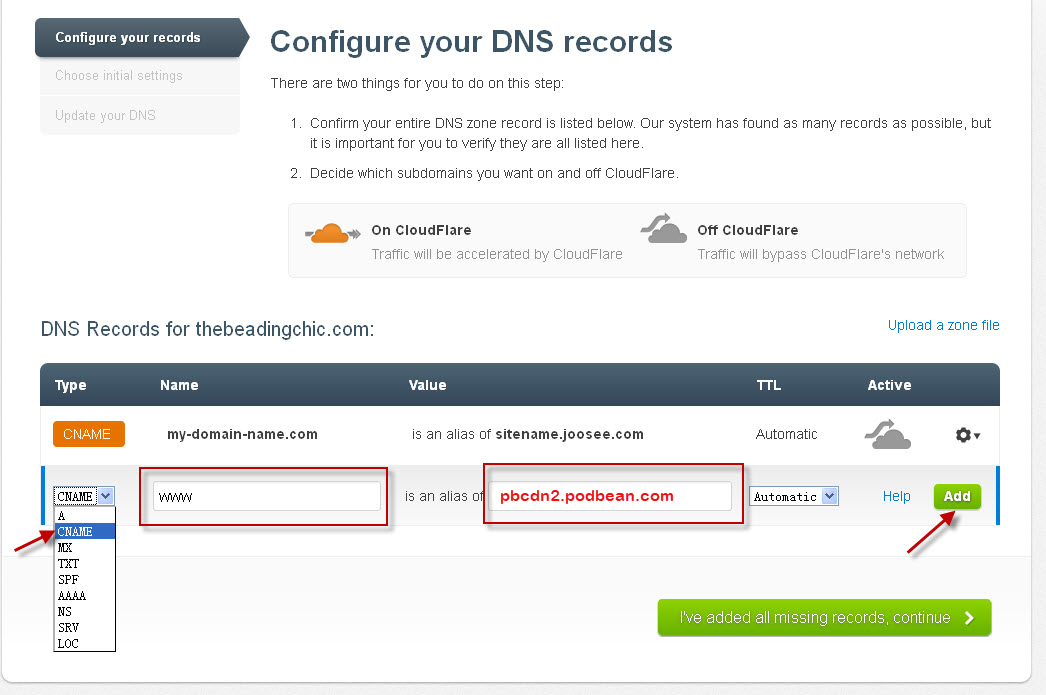
3. Add CNAME records

To add a CNAME record for your root domain, do the following: select the "CNAME" option from the "Type" drop down list, then fill in your root domain (e.g. my-domain-name.com) in the "Name" field, put "pbcdn2.podbean.com" in the "Value" field. Finally, click the "Add" button.
To add a CNAME record for your www.my-domain-name.com, do the following: select the "CNAME" option from the "Type" drop down list, then fill "www" into the "Name" field, put "pbcdn2.podbean.com" in the "Value" field. Finally, click the "Add" button.
After fill the CNAME records, click the "I've added all missing records, continue" button. Then select the free plan. After you select the free plan, it will show the following 'Downgrade Warning“, just click the "OK" button.

Then, you will have the DNS servers information listed on the page.

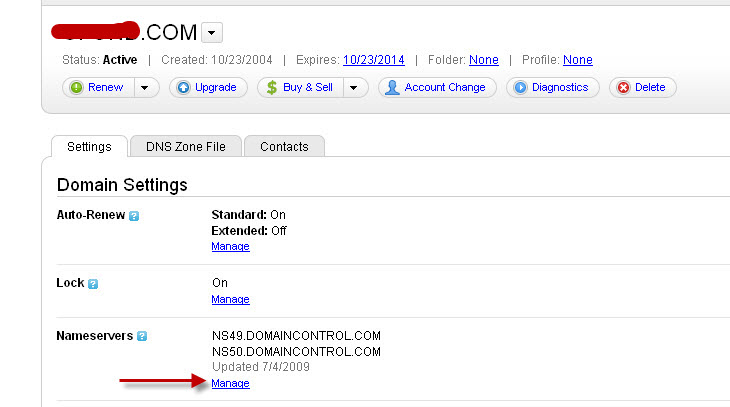
4. Now go to your Godday account to change the DNS servers to the ones given in CloudFlare.com as in above step.
Go to your Godaddy account manage domain page, in the "nameservers" section click the "manage" link.
Select the "Custom" option, the click the "Enter custom namservers" link.
Fill the name servers that you get from CloudFlare.com, then click "OK".


Your CNAME DNS settings are done now. Please note that nameserver changes can take up to 24-48 hours to fully propagate.
Please note that it may take some time for the changes to take effect and that the exact steps may vary slightly depending on your Cloudflare plan and settings. For more detailed instructions and troubleshooting tips, consult Cloudflare's support articles.