1. From your Podcast Dashboard, go to Distribution --> Social Share and connect to WordPress.
2. Then you need to click on “self-hosted” or “Wordpress.com” to choose the appropriate type of your site.
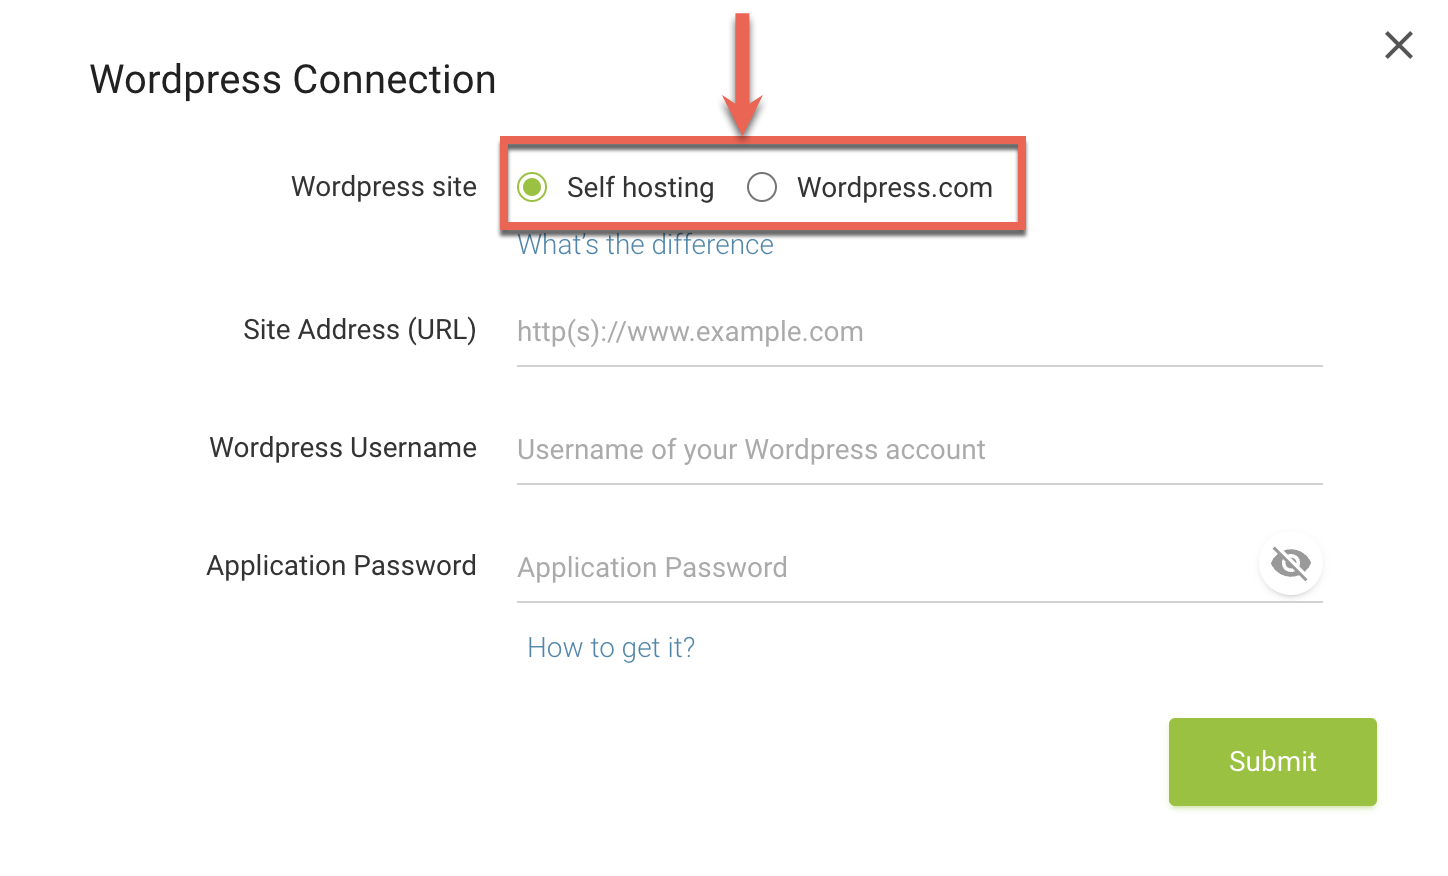
For Self-hosted Wordpress Site
Self-hosted Wordpress Site
Self-hosted Wordpress websites support the embeddable podcast player and custom options such as described below. You need to input your own Wordpress Site Address URL, username and Application Password.

Please refer to WordPress Application Passwords Integration Guide to get your application passwords.
From the Edit User page, you can generate new, and view or revoke existing application passwords.

*Note: The application password name is only used to describe your password for easy management later. It will not affect your password in any way.
Once the Add New button is clicked, your new application password will appear. Be sure to keep this somewhere safe, as it will not be displayed to you again. If you lose this password, it cannot be obtained again.
After completing your Wordpress account information, click “Submit”.

To customize posting options:
- Click on the “edit” pencil icon for your connected Wordpress account to get the dropdown menu.
- Enter the category name. If you wish to post to more than one category you want the episodes to appear in(separate the category by commas).

Wordpress.com Site
Wordpress.com sites will display a simple play image in the post. To connect to Wordpress.com, you just need to click the “Connect Wordpress” button.

Once you have the connection set up, the new episode will now automatically post on your Wordpress site (there may be a few minutes delay for this to update).
You can click the “Share and Embed” button on the right side of the episode title to check the auto share status. If your episode is failed to be shared to one destination, click the “Try again” to make the system re-share it for you.
