Introduction
By deploying the Podbean Pro Android and iOS mobile apps through a Unified Endpoint Management (UEM) solution (such as VMware Workspace ONE UEM), an administrator can configure them for their end users so that there is no need to enter the Podbean tenant details. This greatly improves the initial end-user experience and reduces the potential for support tickets. See appconfig.org for more details on this.
Managing the Android Podbean Pro App
Prerequisites
- Android GMS device running Android 5.0 or later.
- UEM software, like VMware Workspace ONE UEM.
- Completed the Android Enterprise integration within your UEM environment.
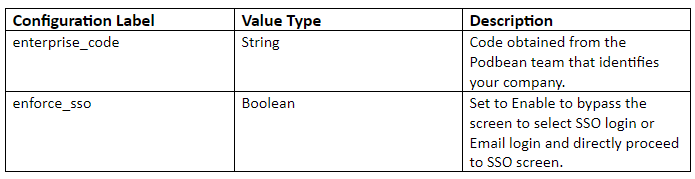
Managed App Configuration
Deploying Podbean Pro with Workspace ONE UEM
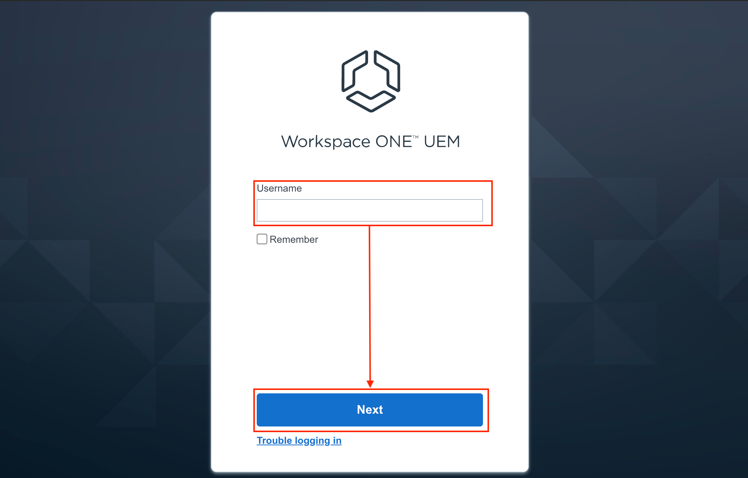
1. Log in to your Workspace ONE UEM admin console:
If you do not have a Workspace ONE UEM environment, you can request a free trial.
2. Ensure you have completed the Android Enterprise integration within Workspace ONE UEM.
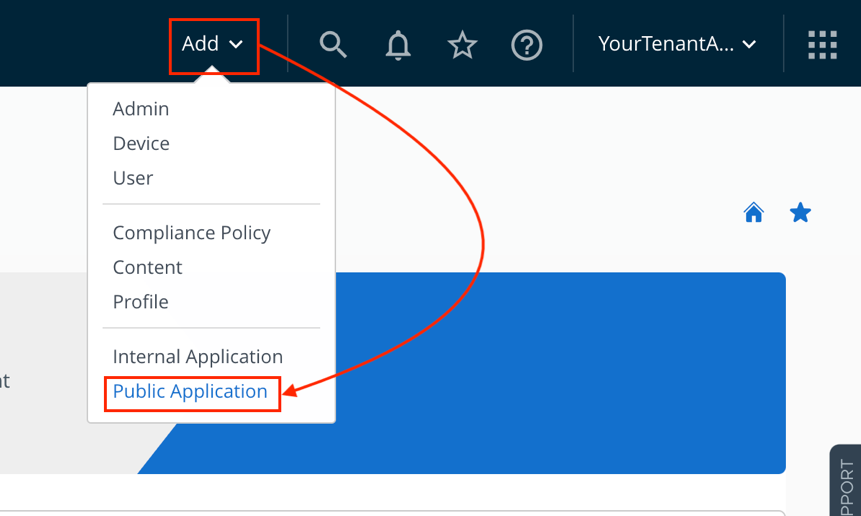
3. Select Add> Public Application at the top-right:
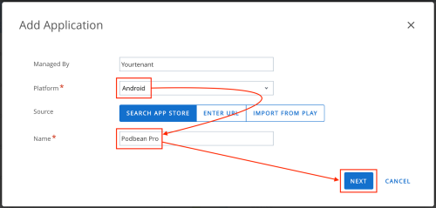
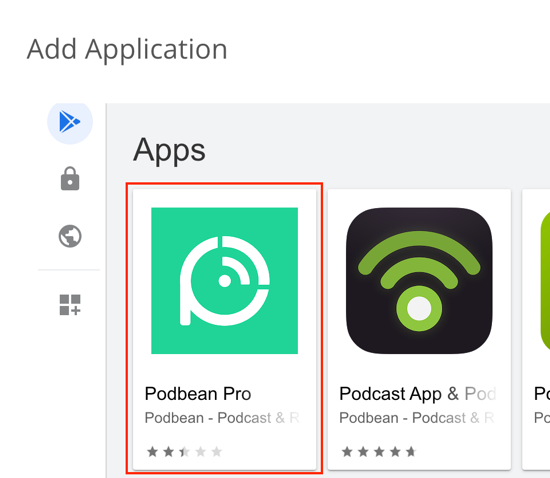
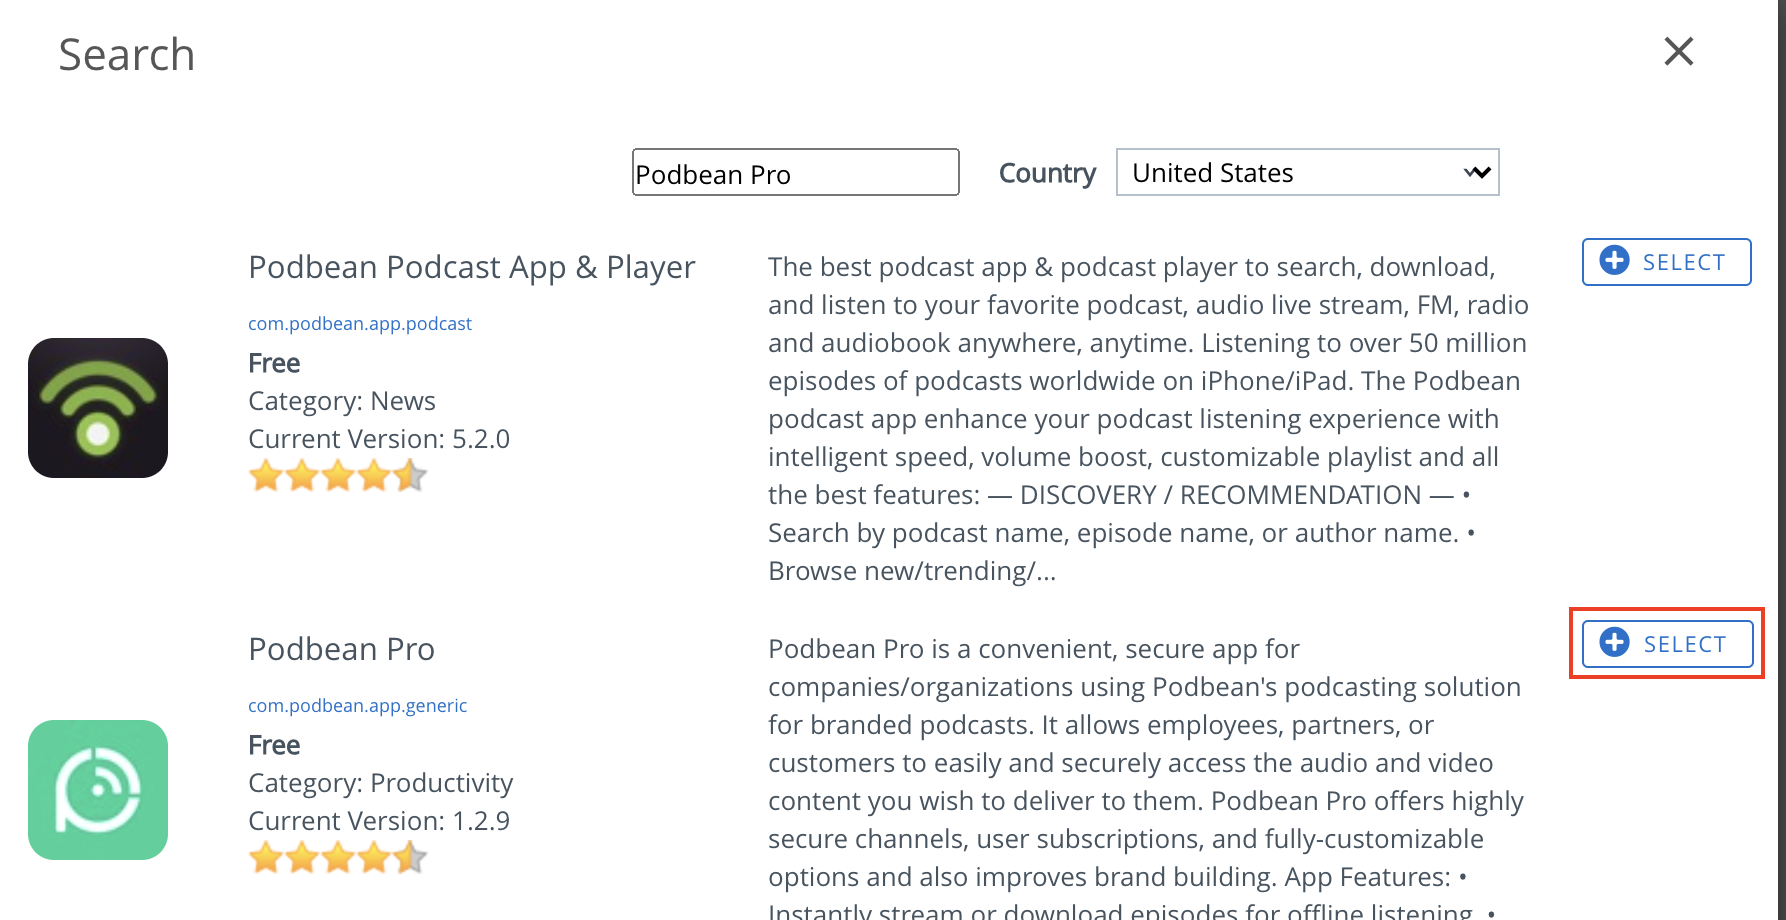
4. Select Android as the platform, enter Podbean Pro and select Next:
5. Select Podbean Pro:
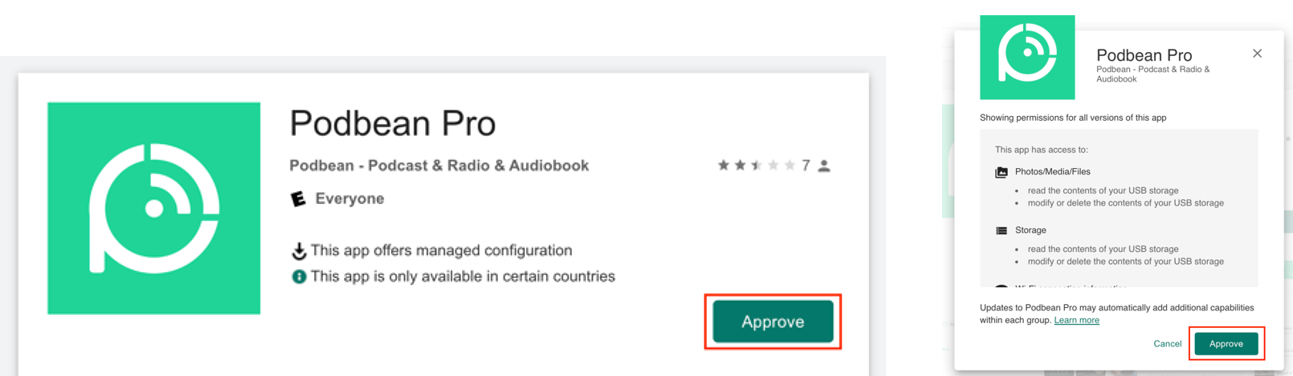
6. Select Approveto Podbean Pro and Approve to the current permissions:
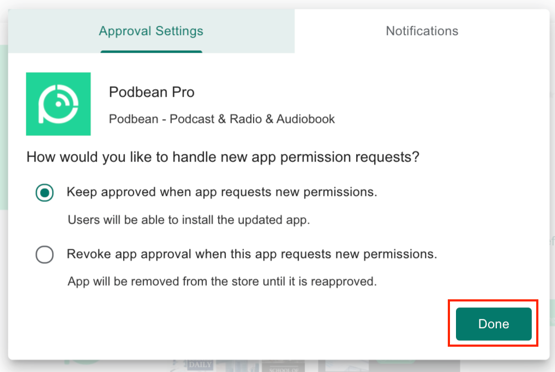
7. Choose your Approval Settings for future permissions changes and select Done:
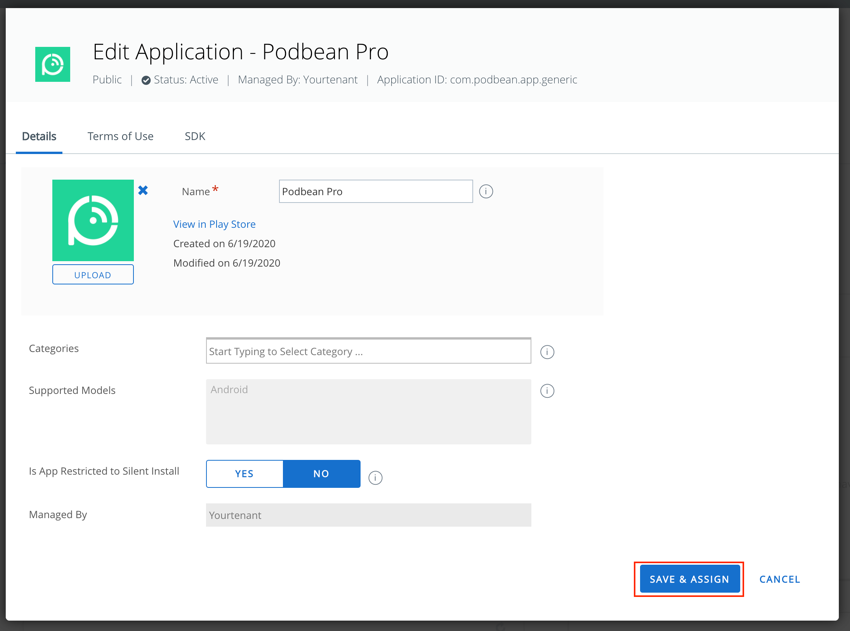
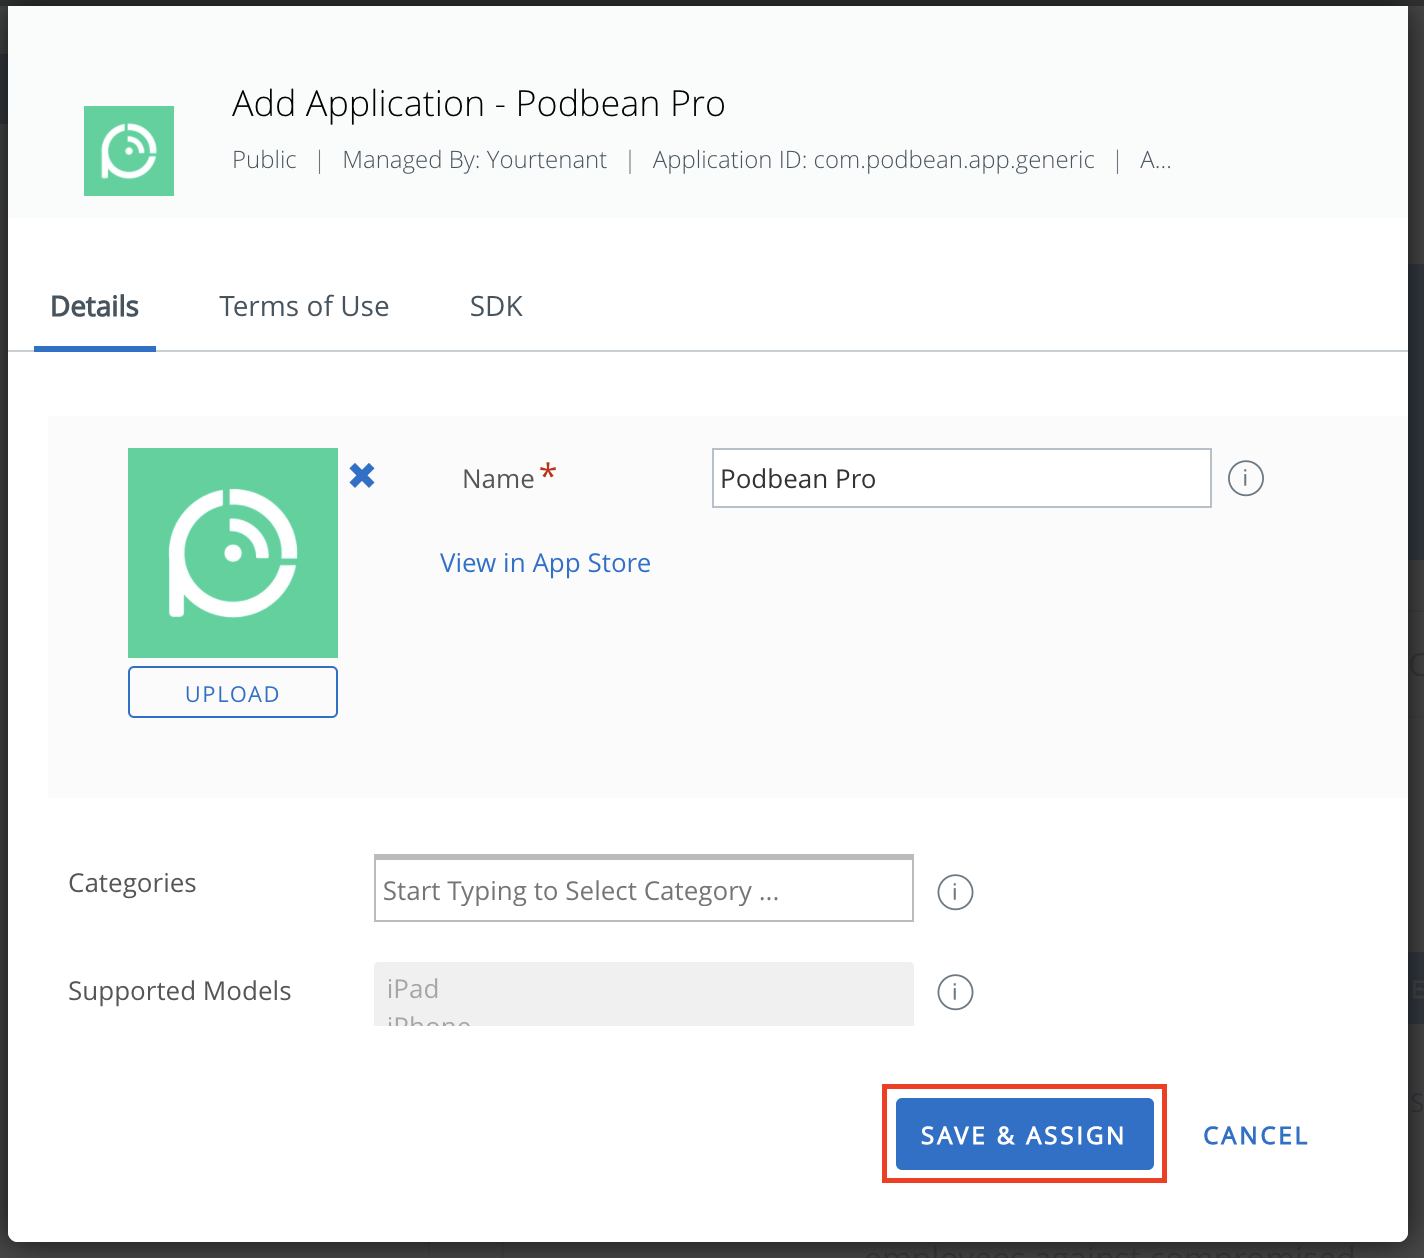
8. Select Save & Assign to begin the assignment process:
9. Set a Name for your distribution, select the targeted Assignment Group(s), select if you want to Automatically deploy the app or make it available On Demand in the app catalog, and select Application Configuration:
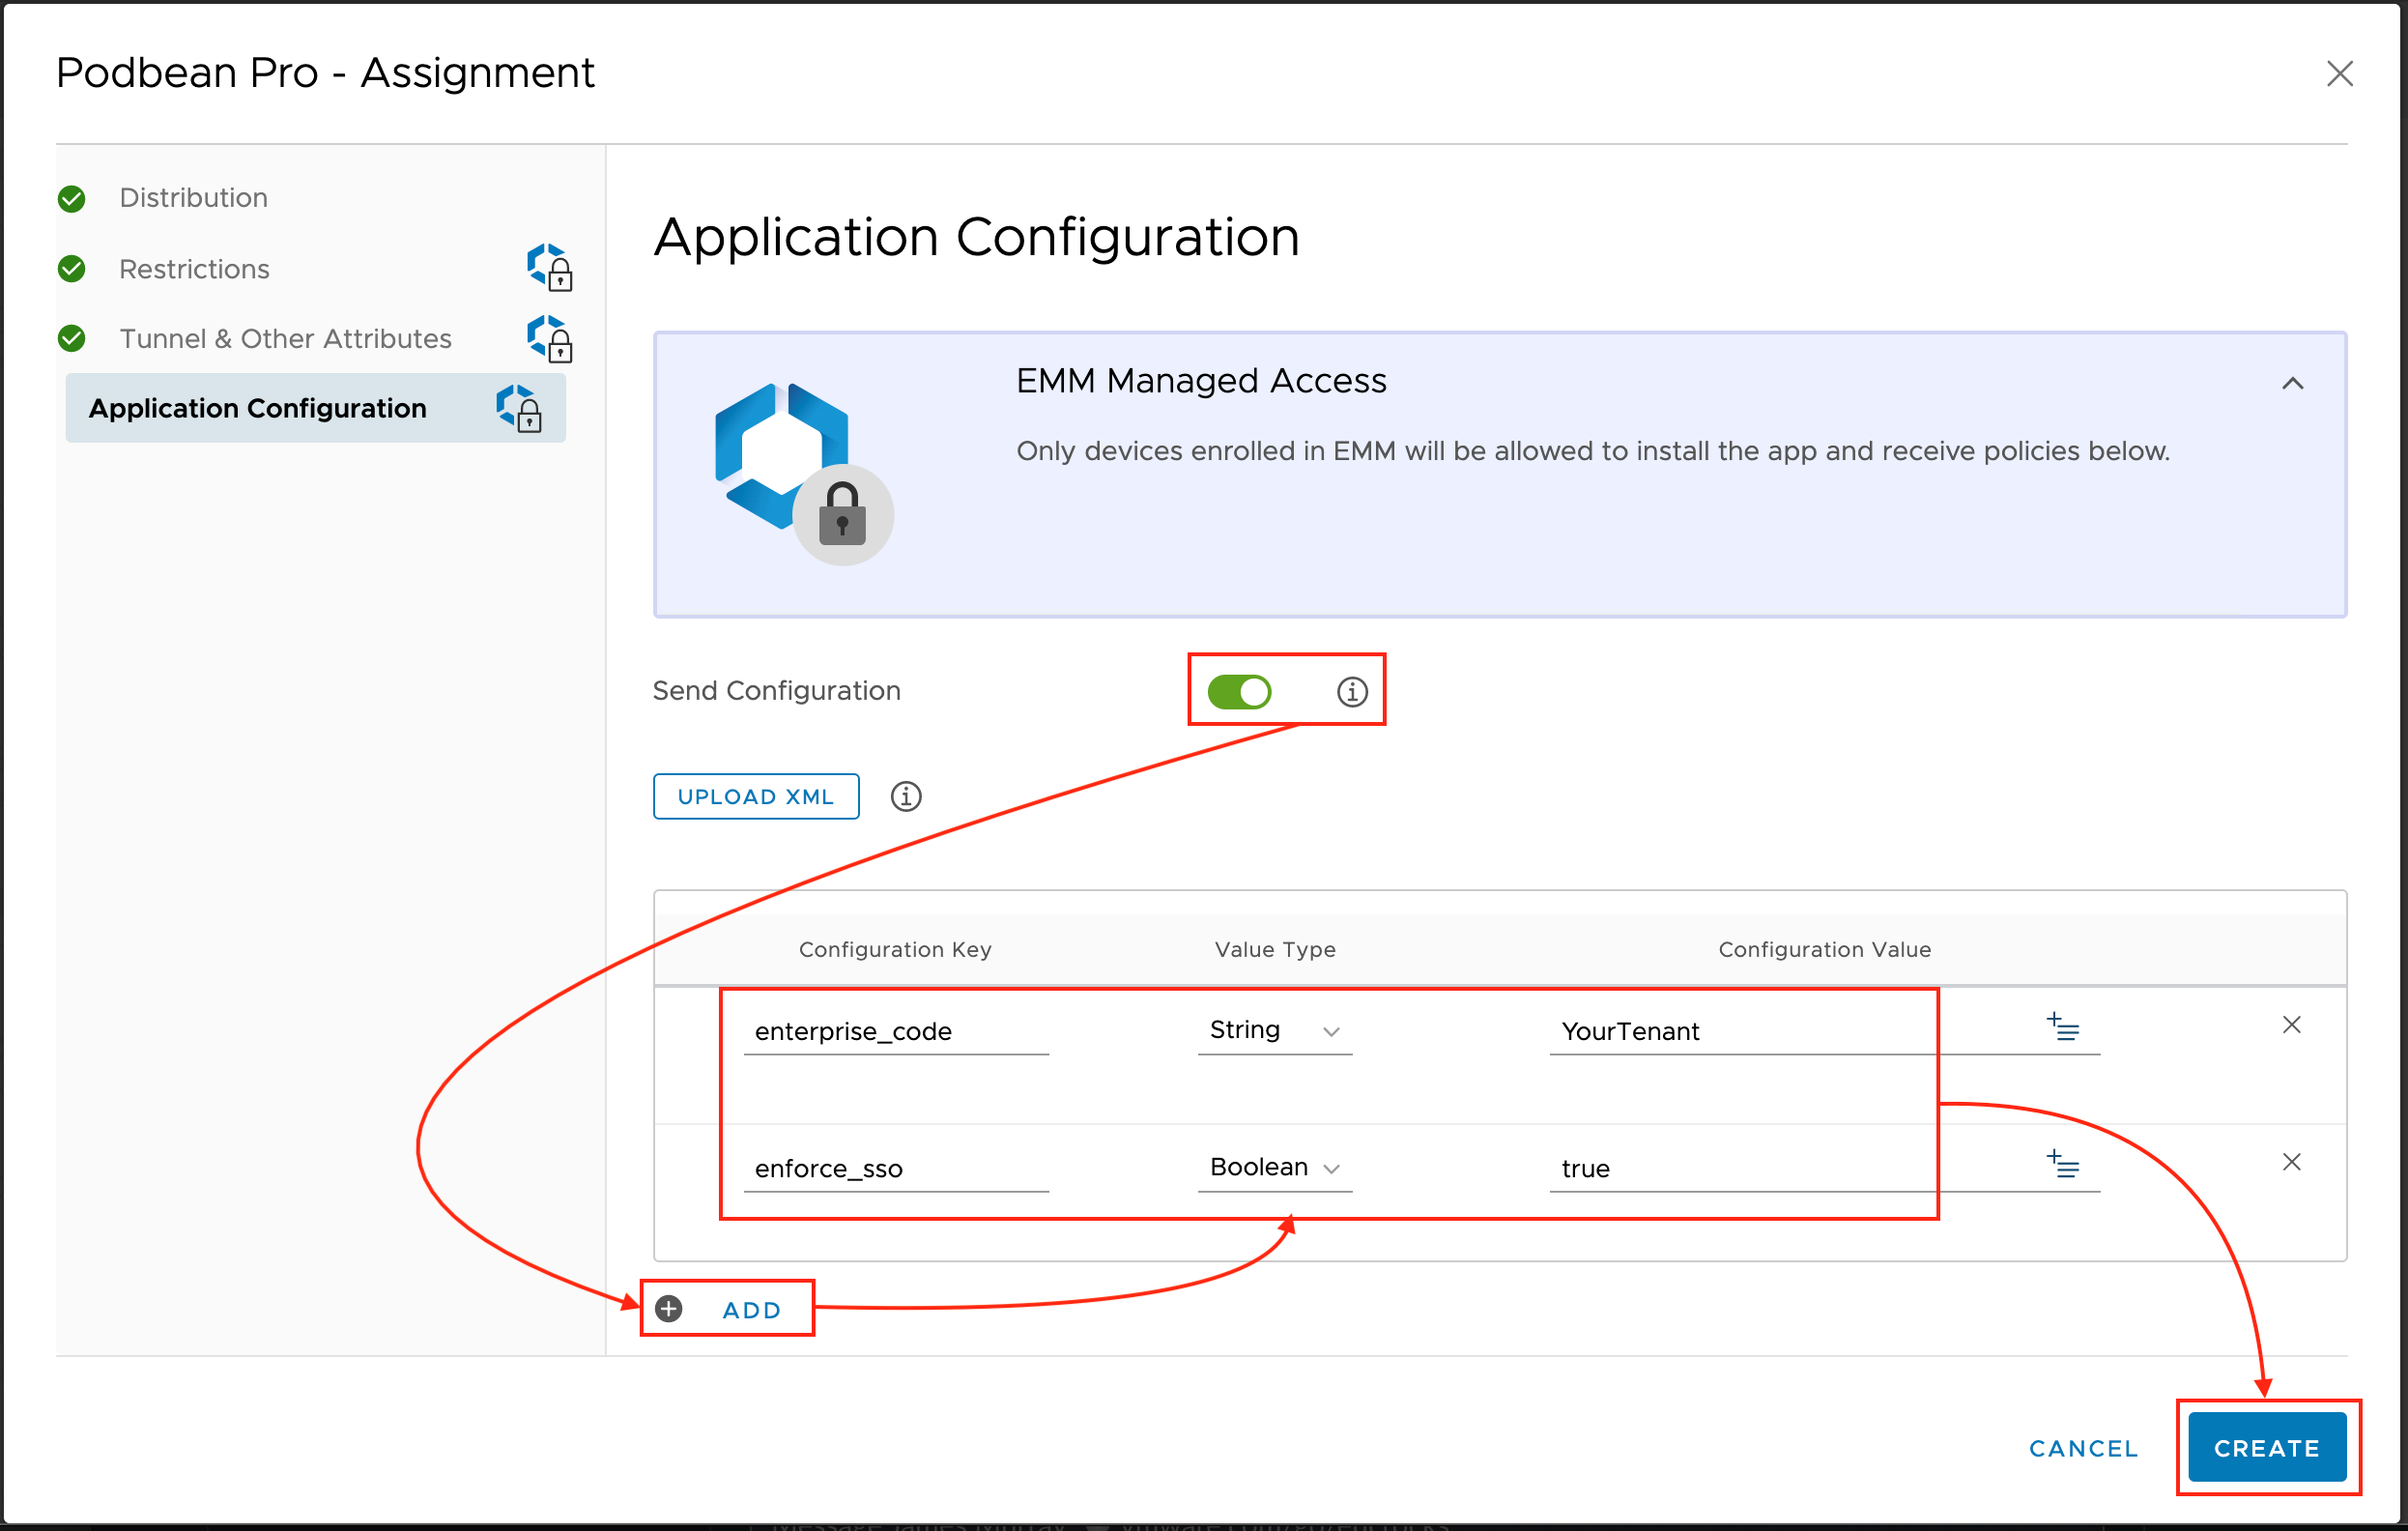
10. Enable the Send Configuration toggle, enter your enterprise_code, and select if you would like to enable enforce_sso, or not. Select Create:
11. Select Save to confirm your assignment:
12. Preview the devices that will be assigned to Podbean Pro and select Publish:

Managing the iOS Podbean Pro App
Prerequisites
- Apple iOS device running iOS 7 or later.
- UEM software, like VMware Workspace ONE UEM.
Managed App Configuration
Deploying Podbean Pro with Workspace ONE UEM
1. Log in to your Workspace ONE UEM admin console:
If you do not have a Workspace ONE UEM environment, you can request a free trial.
2. Select Add> Public Application at the top-right:

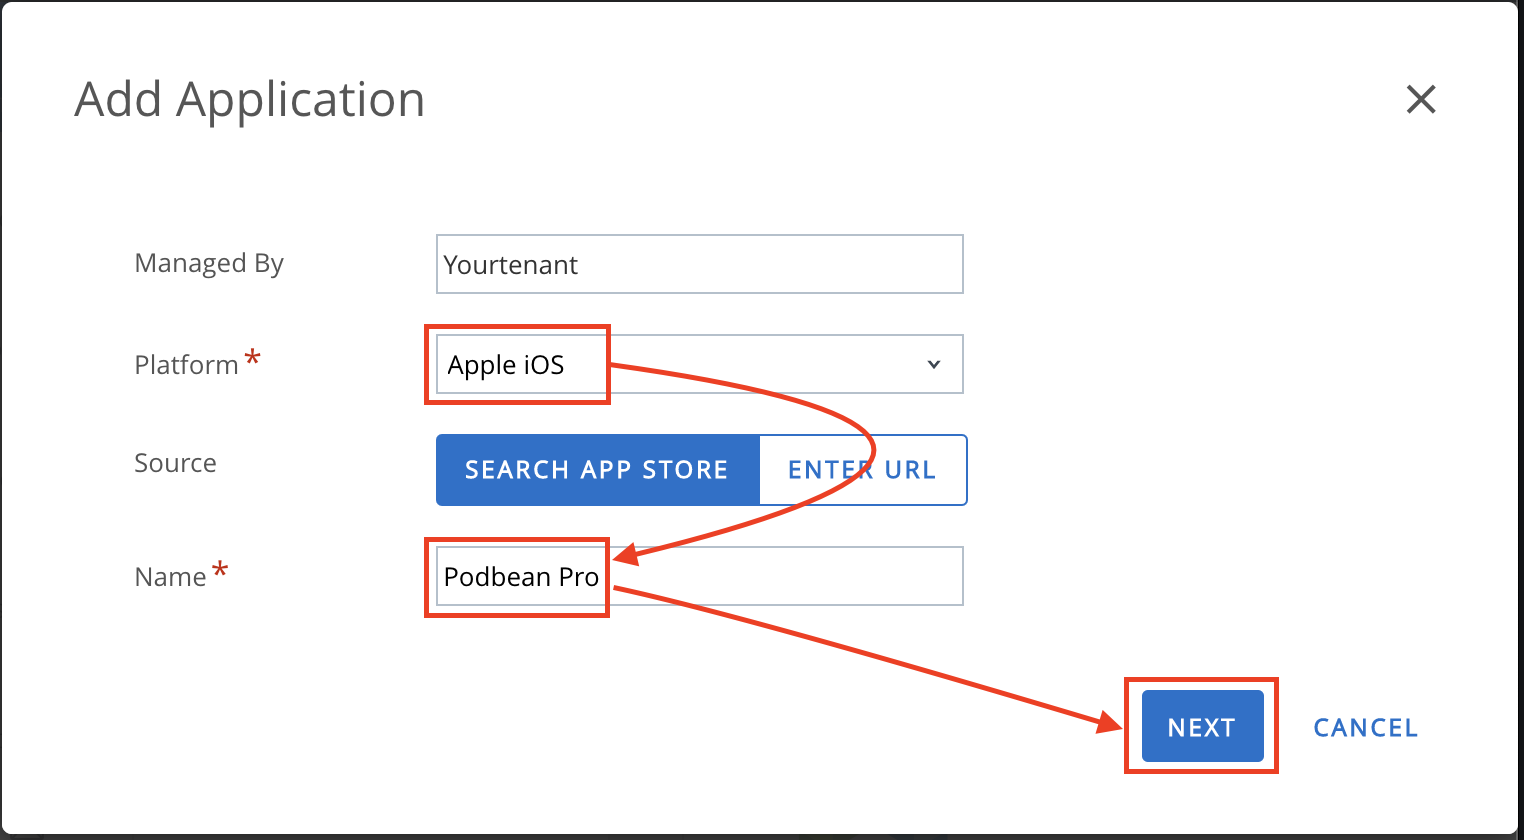
3. Select Apple as the platform, enter Podbean Pro and select Next:
4. Select Podbean Pro:
5. Select Save & Assign to begin the assignment process:
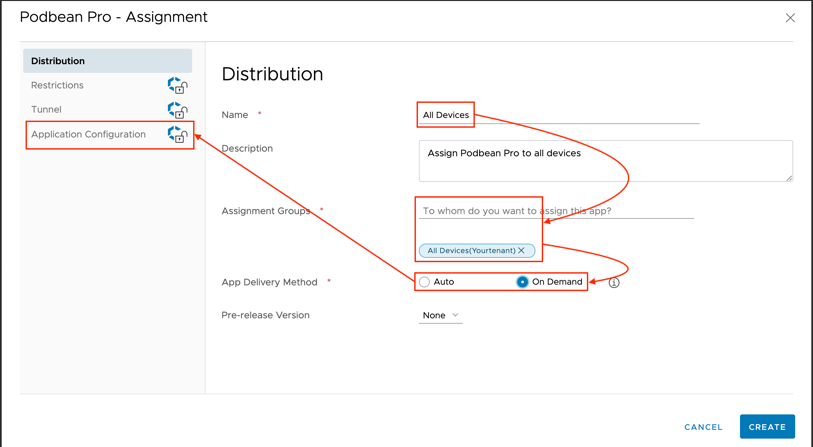
6. Set a Name for your distribution, select the targeted Assignment Group(s), select if you want to Automatically deploy the app or make it available On Demand in the app catalog, and select Application Configuration:
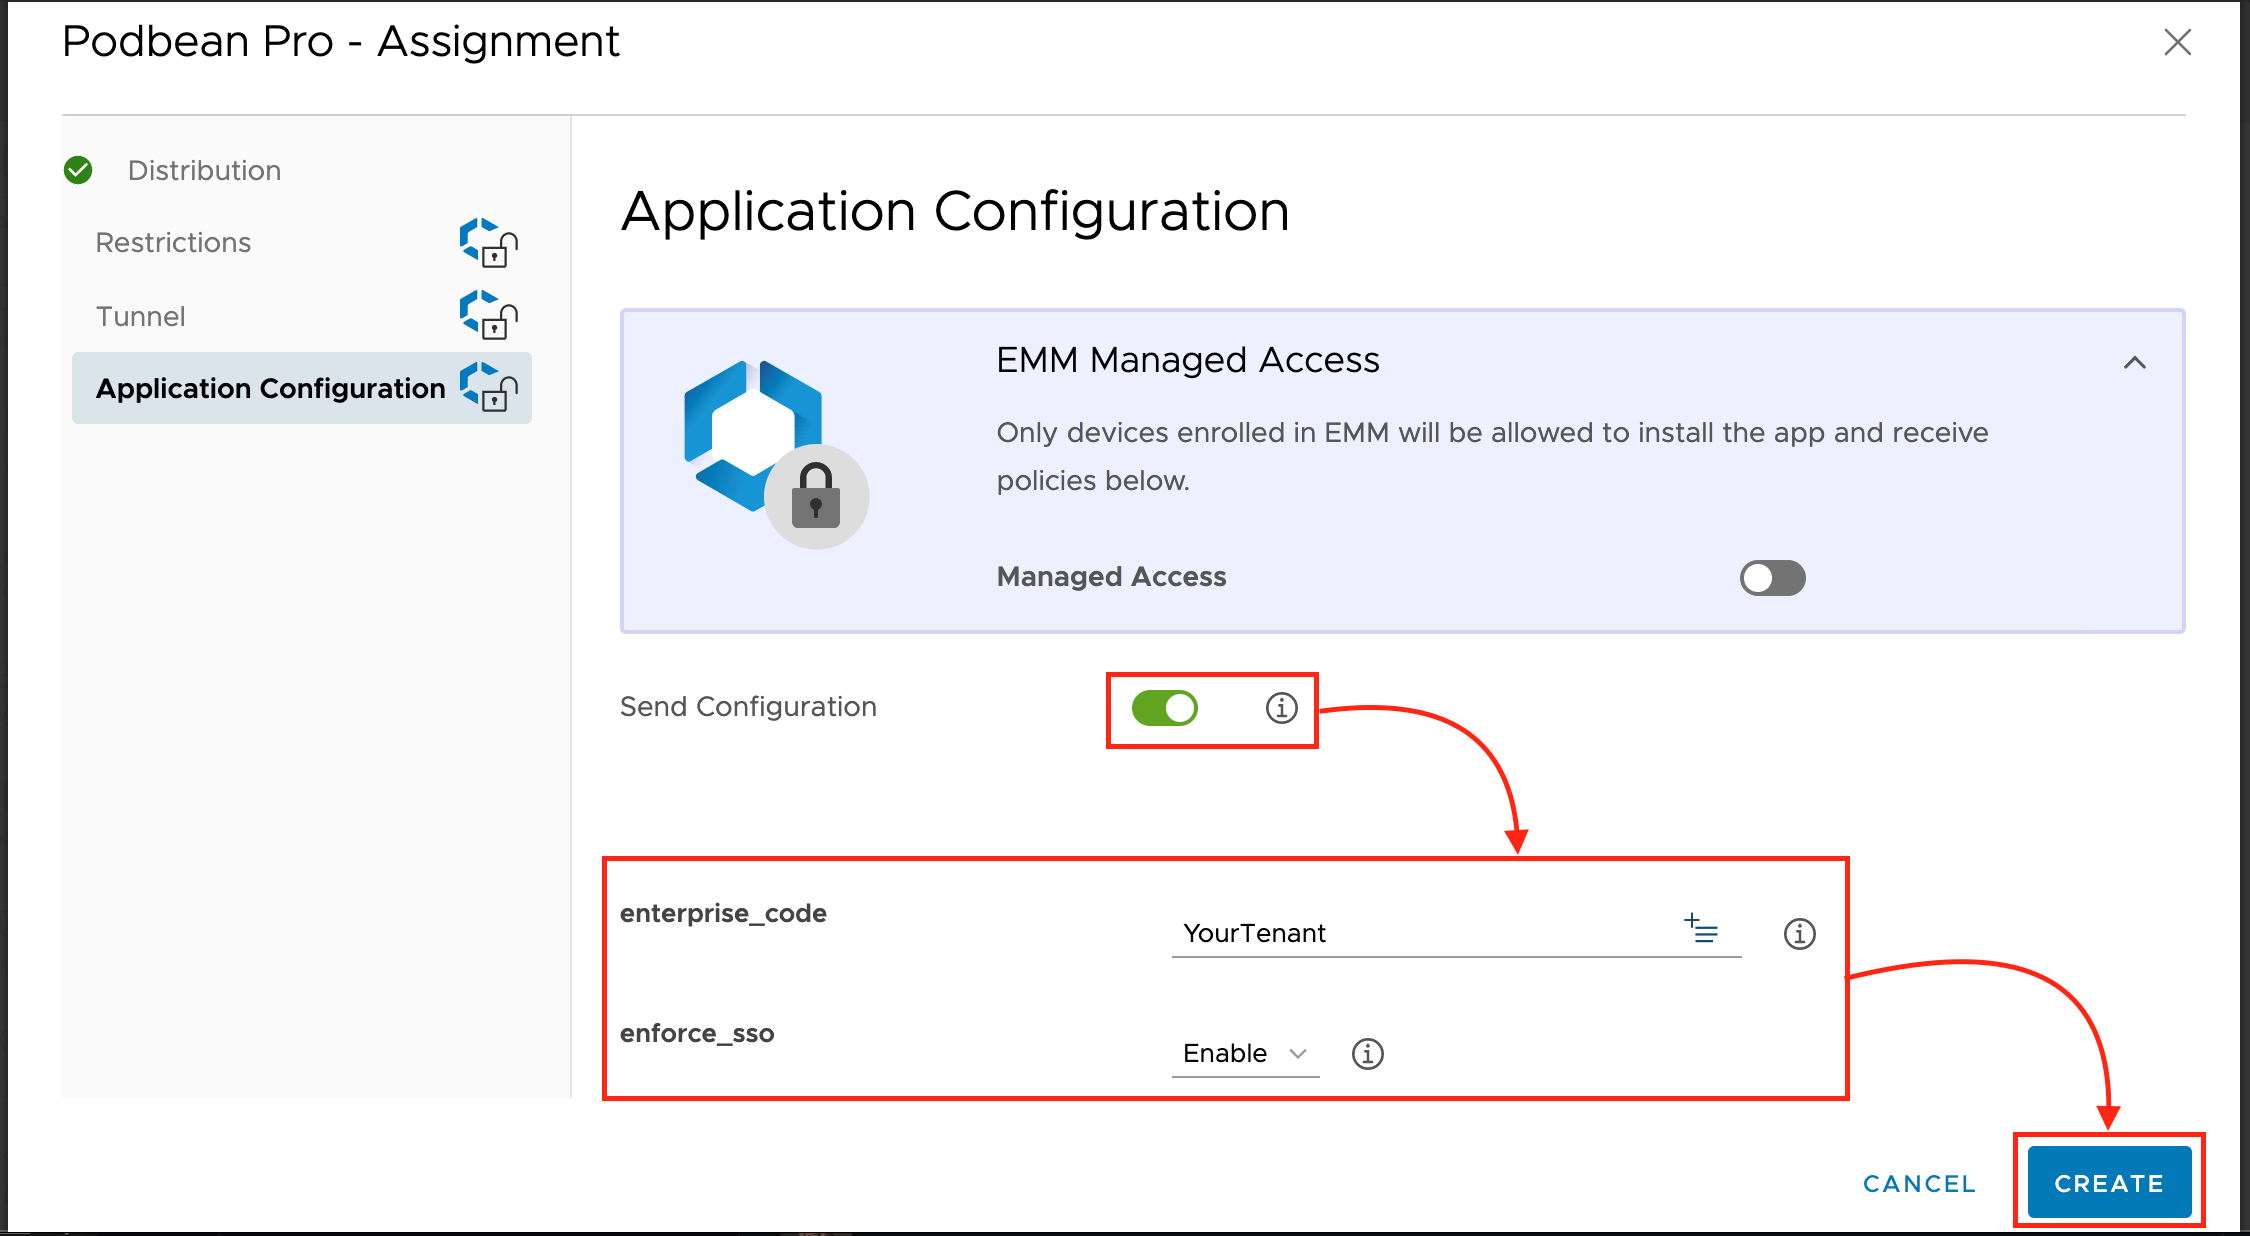
7. Enable the Send Configuration toggle, select Add, set the Configuration Key to enterprise_code, set the Value Type to String, and enter your enterprise code. If you would like to enforce SSO, then select Add, set the Configuration Key to enforce_sso, set the Value Type to Boolean, and enter true. Select Create:
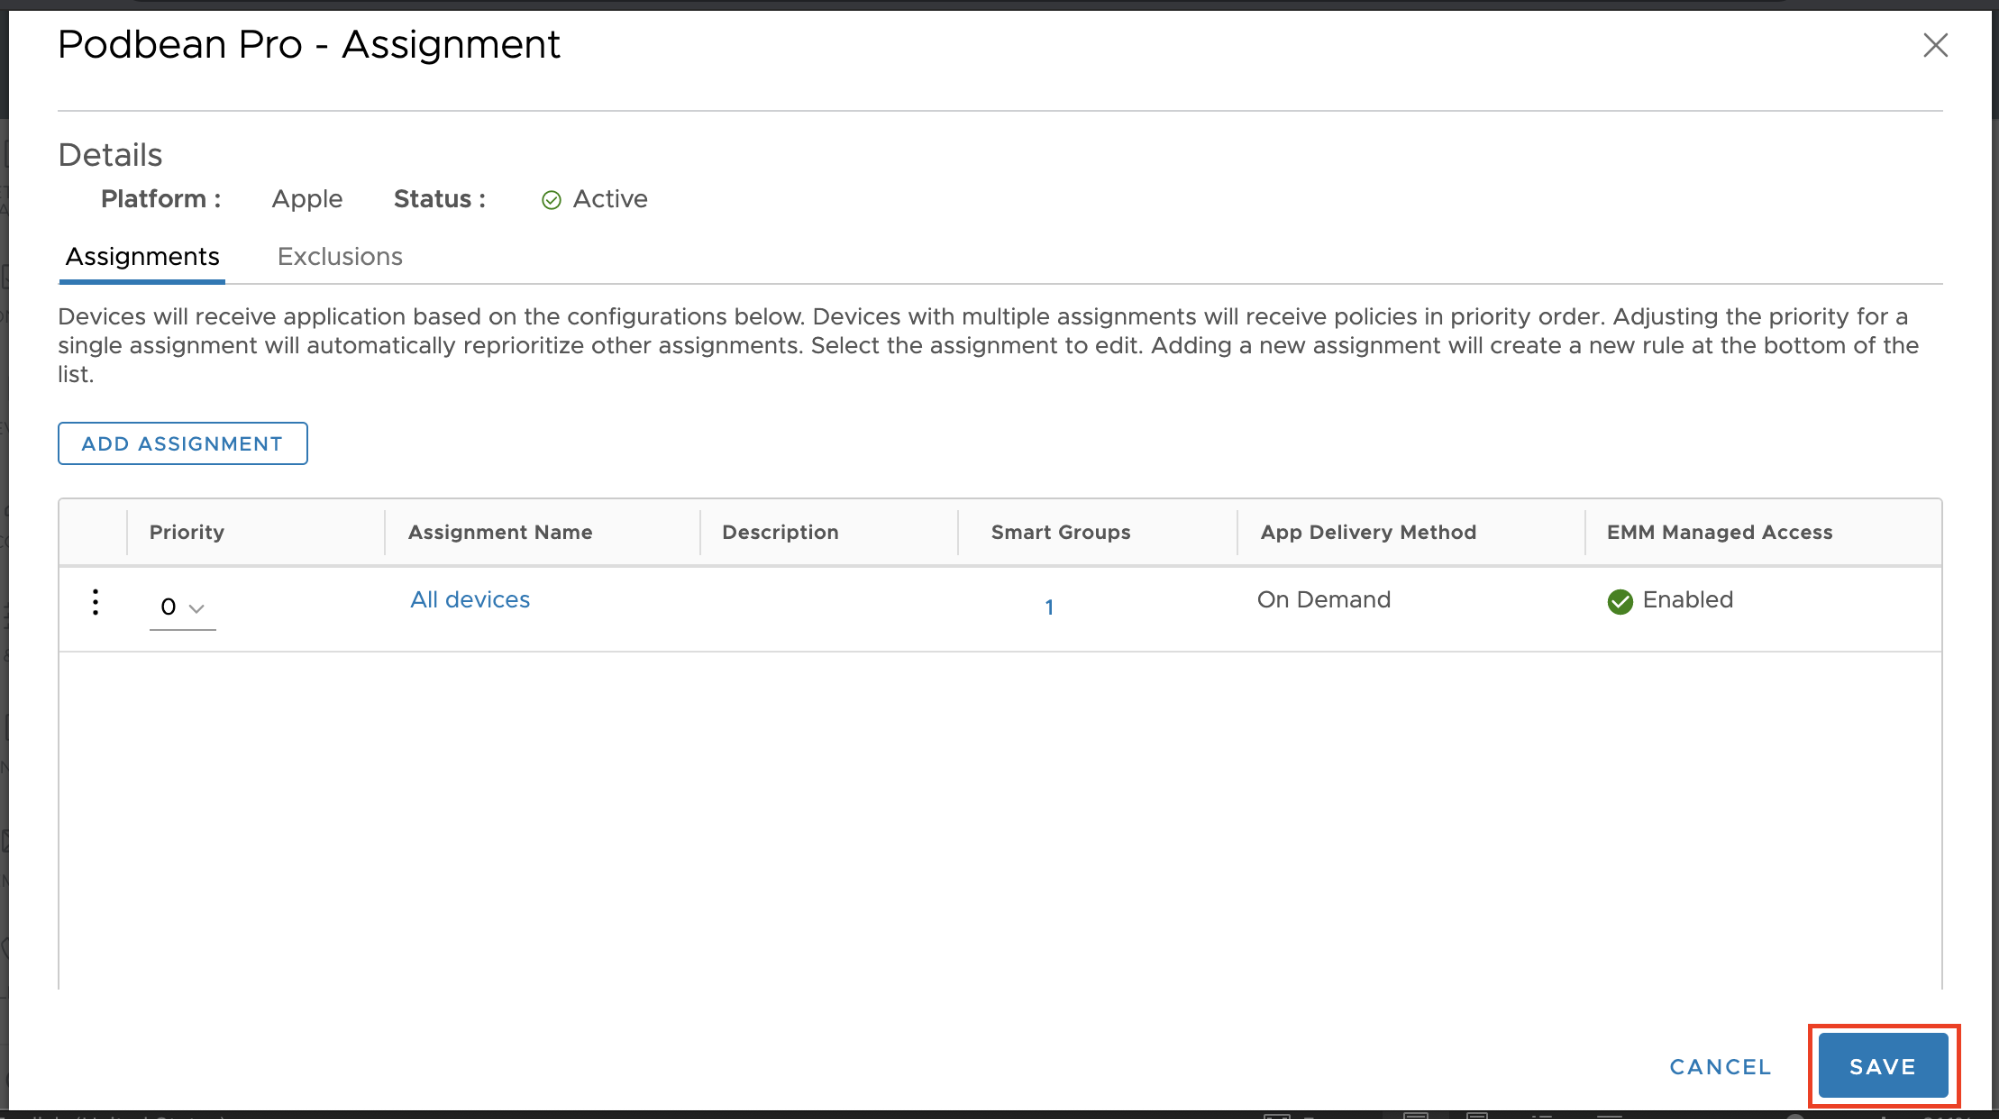
8. Select Save to confirm the assignment:
9. Preview the devices that will be assigned to Podbean Pro and select Publish: