
Podbean Dynamic Ad Insertion lets you deliver ads or other audio content through campaigns in your podcast episodes. This guide explains how to create, manage, and remove a campaign.
Before you get started, please note:
- Dynamic Ad Insertion is available to users on the Podbean Unlimited Audio plan or higher.
- Dynamic Ad Insertion supports inserting audio ads or other audio content into audio episodes only. Video ads and ad insertion in video episodes are not supported at this time.
In this guide, you’ll walk through:
- Access Dynamic Ad Insertion
- Create a Dynamic Ad Campaign
- View Campaign Status
- Edit or Update a Campaign
- Remove a Campaign
Access Dynamic Ad Insertion
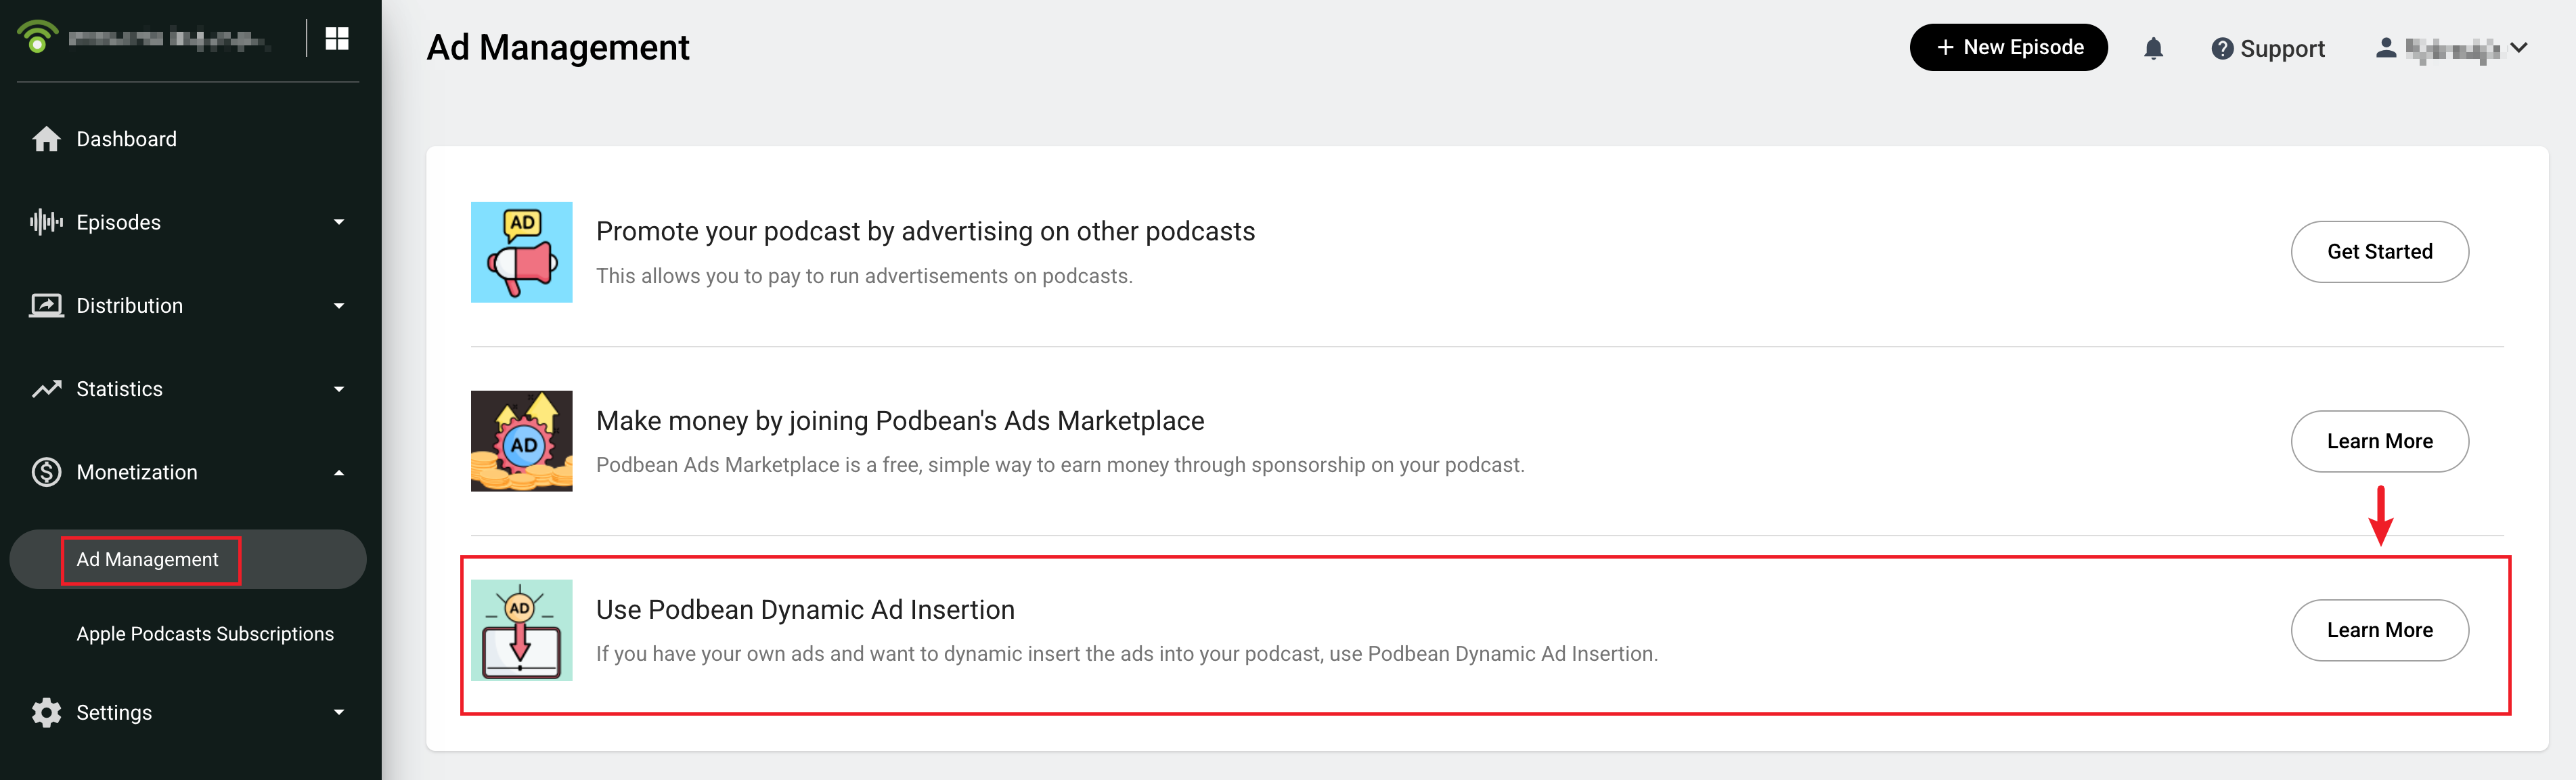
- Log in to your Podbean account and open your podcast dashboard.
- Go to Monetization -> Ad Management.
- Enter the Use Podbean Dynamic Ad Insertion section.
Create a Dynamic Ad Campaign
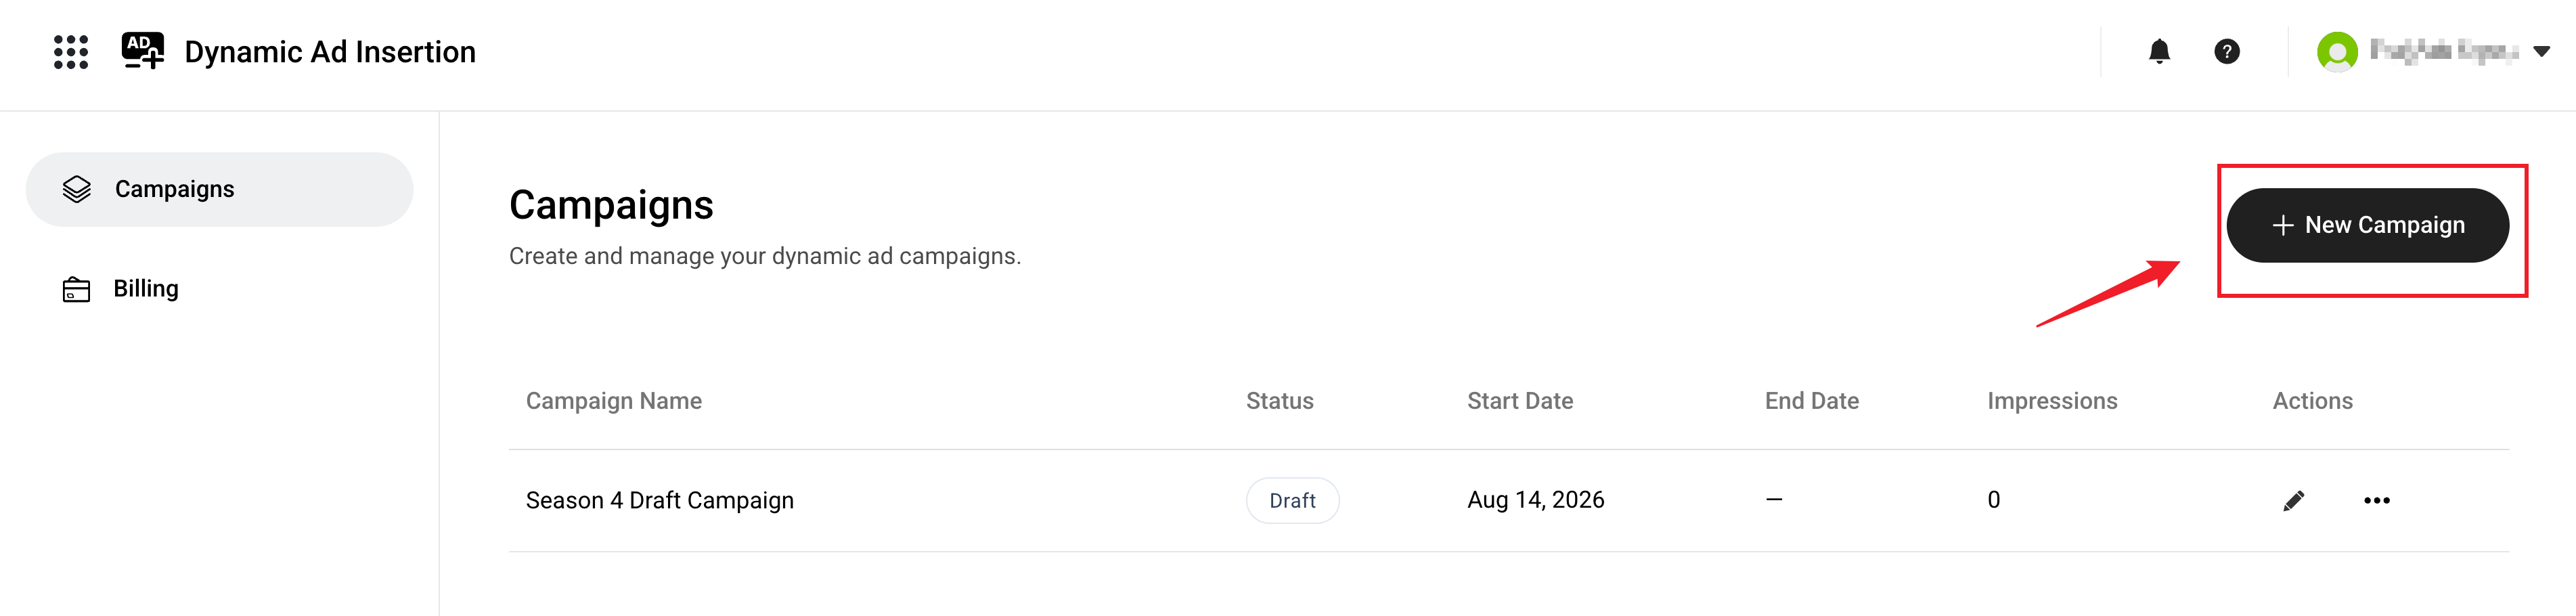
On the Dynamic Ad Insertion – Campaigns page, click the "+ New Campaign" button in the upper-right corner to create a new campaign.
The Create New Campaign page includes three sections:
Campaign Settings
In this section, you can configure the basic settings for your campaign:
- Campaign name
- Start date
The campaign will start at 00:00 UTC on the selected date. - End date (optional)
Select an end date if you want the campaign to stop automatically. The campaign will end at 00:00 UTC on the selected date. - Max impressions (optional)
Set an impression limit if you want the campaign to stop automatically after reaching a specific number of impressions. - Priority
When multiple ads are available for the same position, use the priority level to control their playback order. Priority ranges from 1 to 10, with higher numbers indicating higher priority. For more information, see Deep Dive into Ad Priorities and Playback Logic. - Ad Delivery
Inform the countries and regions where ads can be delivered. For more information, see Where Are Ads Delivered?
Ads
Choose how to provide your ad content.
You can select one or more of the following ad positions:
- Pre-roll: Ads will be inserted into pre-roll time slots, typically at the beginning of episodes.
- Mid-roll: Ads will be inserted into mid-roll time slots, typically in the middle of episodes.
- Post-roll: Ads will be inserted into post-roll time slots, typically at the end of episodes.
You can provide ad content in either of the following ways:
- Upload audio: Upload your own MP3 file.
- Use VAST tag: Enter a VAST ad tag URL. For more information, see Using VAST Ad Tags.
Select Podcasts
Choose the podcasts and episodes where your campaign will run.
For each selected podcast, you can choose:
- All episodes (include future episodes): Run the campaign in all current and future episodes.
- Manually select: Choose specific episodes. You can also include future episodes if needed.
When you are ready, click Create in the upper-right corner to create the campaign. To save your work without creating the campaign, click Save as draft.
Created and saved campaigns will appear in the list on the Campaigns page.
View Campaign Status
Campaigns can have the following statuses:
- Draft
The campaign has been saved but has not been created to run. - Pending
The campaign is ready to run. It is either being prepared or awaiting its scheduled start date. - Running
The campaign is currently active and delivering ads. - Ended
The campaign has ended according to its settings. - Removed
The campaign has been manually removed.
Edit or Update a Campaign

- On the Campaigns page, find the campaign you want to update.
- Click the Edit button on the right side of the campaign.
- Update the campaign settings, ad content, or selected podcasts and episodes as needed.
- Save your changes:
- For a Draft campaign, click Save as draft in the upper-right corner to keep it unpublished, or click Create when you are ready to run it.
- For a Pending or Running campaign, click Save in the upper-right corner to apply your changes.
- For a Draft campaign, click Save as draft in the upper-right corner to keep it unpublished, or click Create when you are ready to run it.
Remove a Campaign

- On the Campaigns page, find the campaign you want to remove.
- Click the More actions button (three dots) on the right side of the campaign.
- Select Remove campaign.
- Click Remove to confirm.
Once removed, the campaign will no longer deliver ads and cannot be restored or edited.
Learn More
You may also want to learn about: